There are three main things to know about the main center of interest or “focal point” that every painting is supposed to have.
A painting’s main center of interest is an area the artist calls out distinctly from everything else. Artists tend to use “point of interest” and “focal point” interchangeably, but I think the latter is actually the better term. With focal point, you get a visual metaphor of an in-focus camera lens that hints at the techniques involved, as we’ll see below. Also, in keeping with the camera-lens metaphor, there’s only ONE focal point per “shot,” as opposed to potentially several points of interest, main or otherwise.
The focal point’s job is not, as some believe, to make a painting “pop.” Simply including a few areas of significant light-dark and/or color contrast will do for that. No, a good focal-does more than “call the eye”; it provides a unifying anchor for the entire composition. For that you need to know three things:
- where to put it
- how to do it
- and how to make sure it gets the job done (by getting noticed).
Taking it one step at a time:
- WHERE to put it. Most painters recommend placing your focal point NEAR (not necessarily ON) one of the four “power spots” in one of the “quadrants” where, if you drew three lines across and three lines up and down, the lines would converge – as in this painting by Michael Coleman. (Coleman teaches his techniques in video, btw)
Michael Coleman
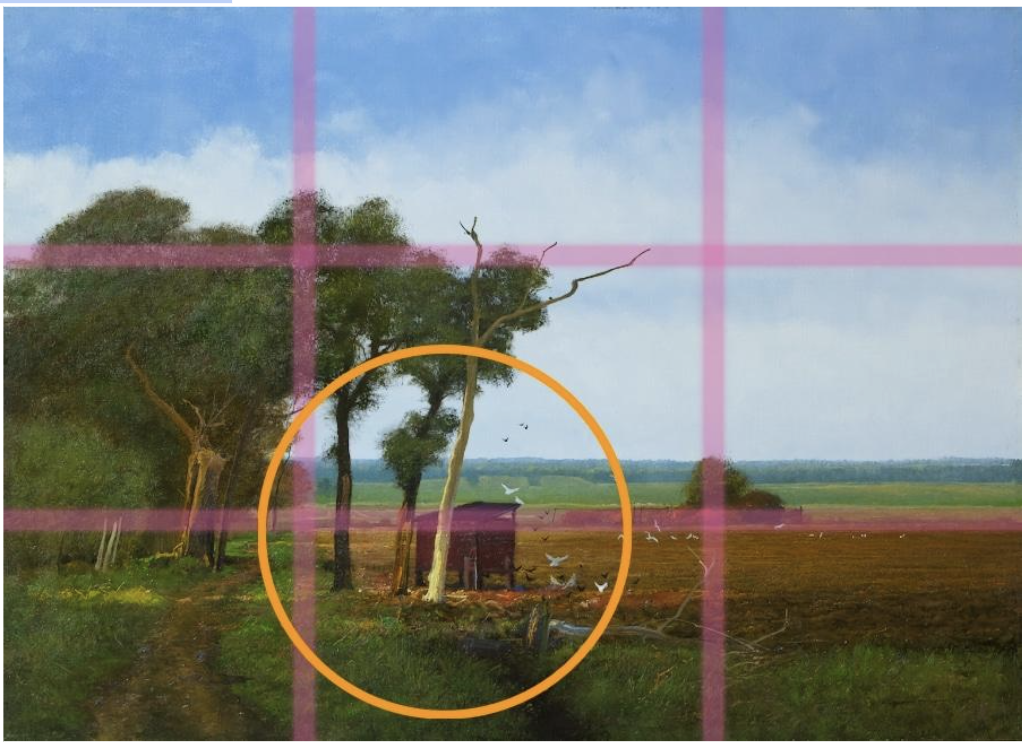
Michael Coleman, “Country Field,” with divisions and circle showing focal point.
In Michael Coleman’s painting (above), the focal point is where the trees pop out against the shed and from the sky. You can tell it from various other points of interest immediately by the hard edges and contrast. Note how the other major compositional elements fall more or less right in line with the grid.
- HOW to do it. Besides placement, value contrast (light vs. dark) is key – placing your painting’s darkest dark right next to your lightest light. This contrast this creates demands attention. In Michael Coloeman’s painting titled “Country Field” (above), the light tree trunk stands out against the dark structure – AND, just to the left, the very dark tree trunks contrast highly with the light blue atmospheric sky. That whole area becomes the focal point.
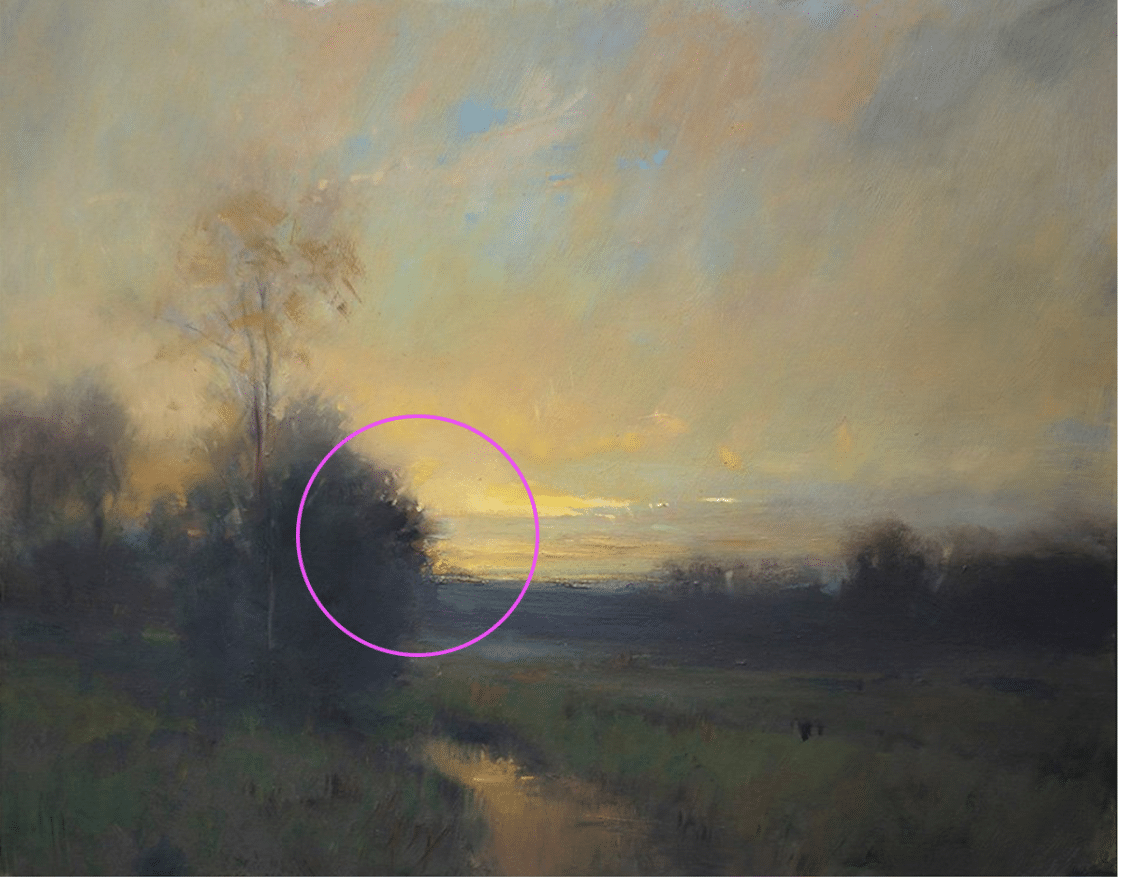
- MAKING SURE it’s noticed. Enhancing that high value contrast, hard, clean edges make up the focal point’s final key component. Punch up the volume on the area of your lightest lights and your darkest darks by also giving us some of the hardest and cleanest, minimally blended edges in the picture. In John MacDonald’s painting (top of page), as well as Michael Coleman’s (above), in just about every other place where dark meets light the edges between them are softened, blended, somewhat lost, as the terminology goes. Again, the eye is drawn to sharp demarcations and areas of stark difference.
Rickie Vios
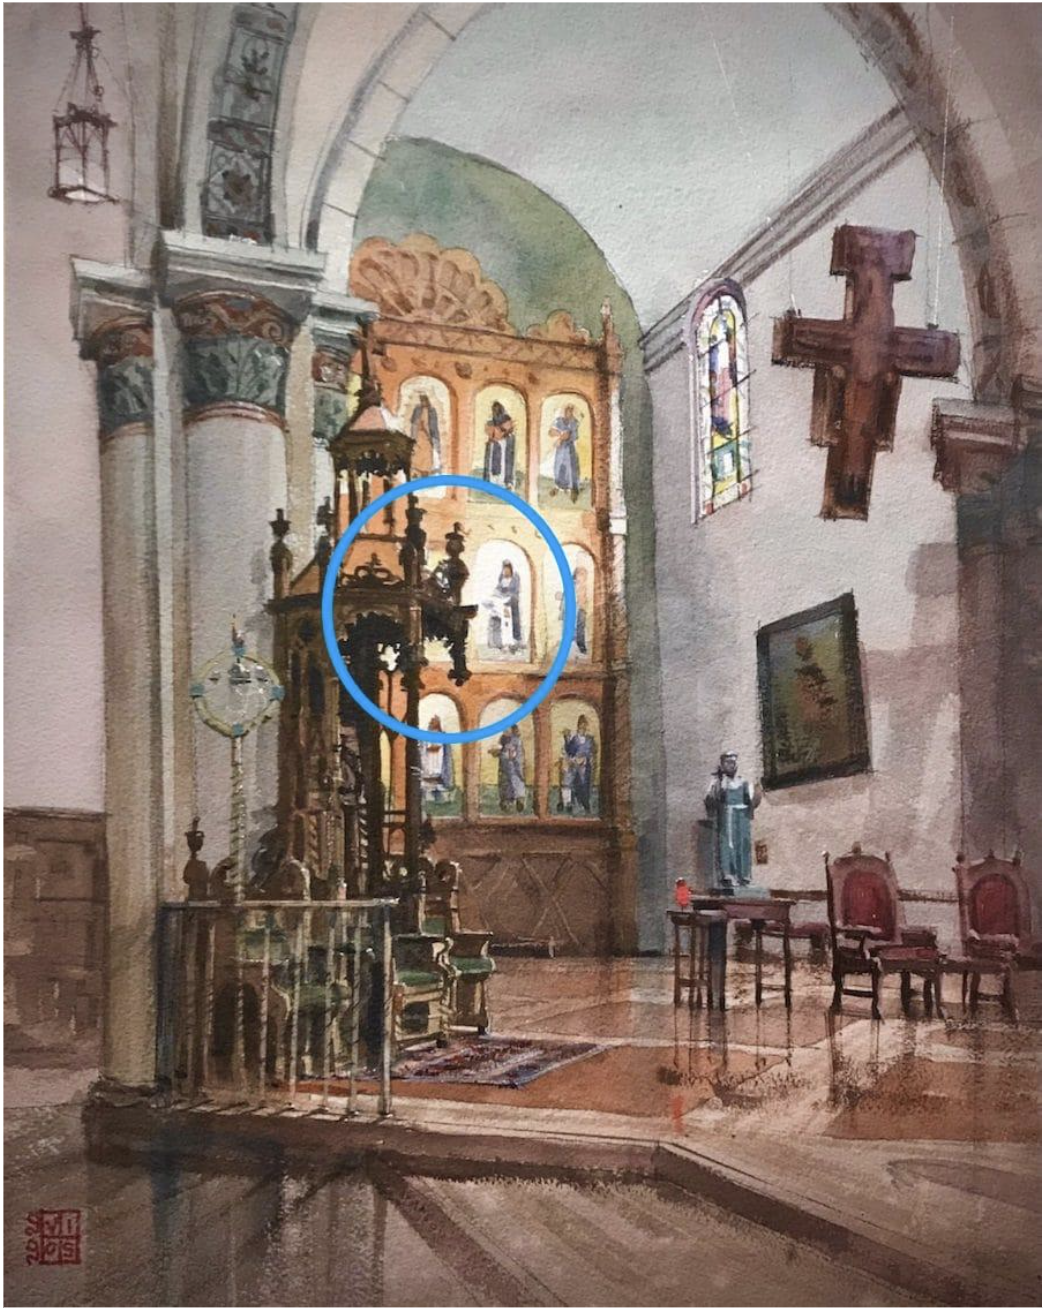
Rickie Vios, “The Nave,” watercolor. Highlighting the darkest dark next to the lightest light and the a hard edges between them. By the way, Rickie Vios in this article breaks the technical process into four steps.
In Rickie Vios’ painting titled The Nave, the darkest darks touch the lightest lights with a hard, contrasty edge that stops the eye. That’s the focal point, and everything else falls into place below it in the hierarchy of where the eye goes first, second, etc. Vios taught at a previous Plein Air Convention and Expo in New Mexico, and he has a number of instructional videos you can check out here.
Winslow Homer
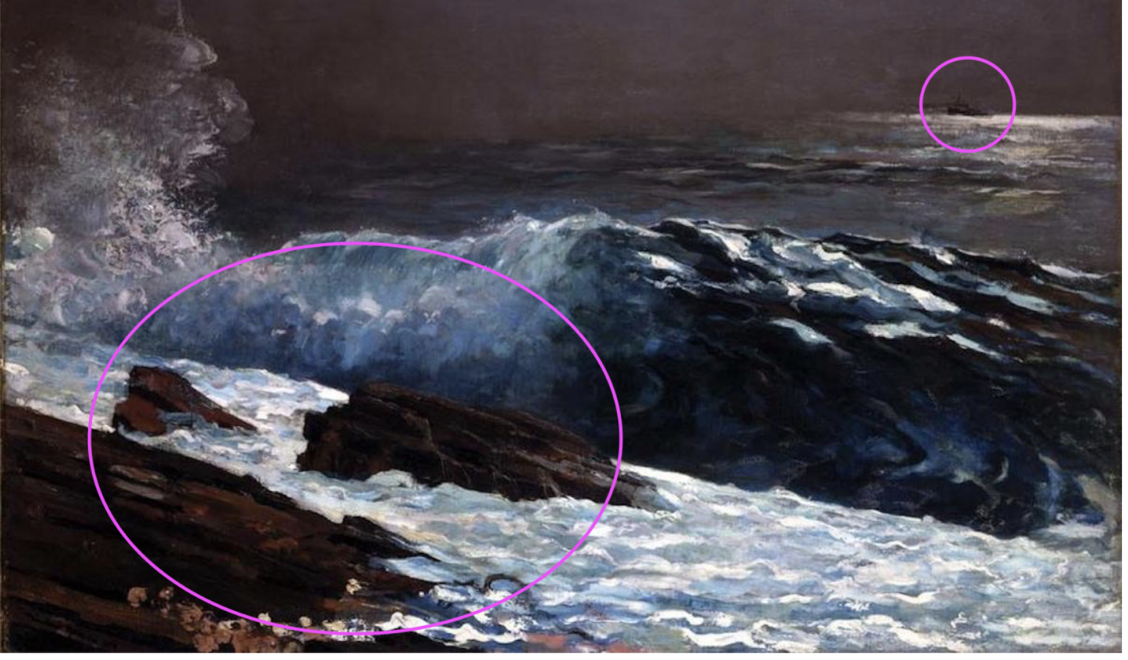
Sunlight on the Coast , 1890, oil on canvas by Winslow Homer, American, 1836 – 1910. Tol e do Museum of Art, Gift of Edward Drummond Libbe
Finally, Winslow Homer’s 1890 oil painting Sunlight on the Coast features crashing waves and slanted rocks that edge anything like humanity out of the picture. Until you notice, that is, a tiny, frail fishing boat balanced on the giant swell in the top right corner. While this “point of interest” is not the main focal point (that’s the dark, hard-edged rocks contrasting with the foam in the lower left quadrant). If not for the contrast Homer builds in between the dark ship’s hull and the silvery strip of light beneath it, we probably wouldn’t notice it at all.
Not every painting needs a focal point. However, it can be a powerful tool for bringing am otherwise “meh” painting to life.