Realist painter David Leffel’s work has been popular for decades, and he’s been teaching students his technique for just as long. Using an “all-in-one-go” style of direct painting called “alla prima,” Leffel combined the look of old master oil painting with modern techniques. (“Old master” is a loose term for antique European oil painters such as Rembrandt, Velasquez, Raphael, and the Dutch masters of landscape, history, and still life paintings, engravings, and portraiture.)
We’ve broken down his process into six basic steps.
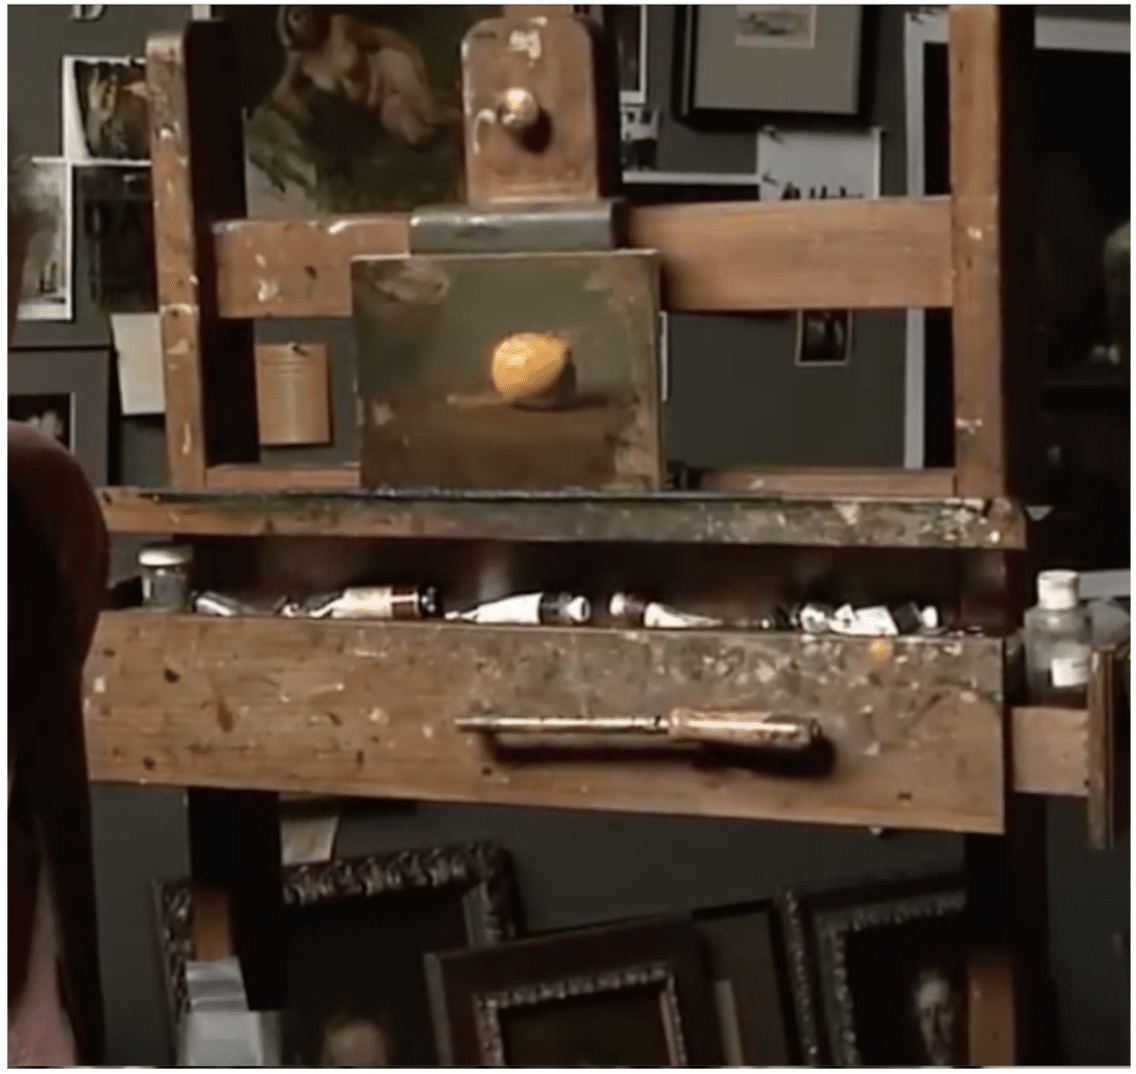
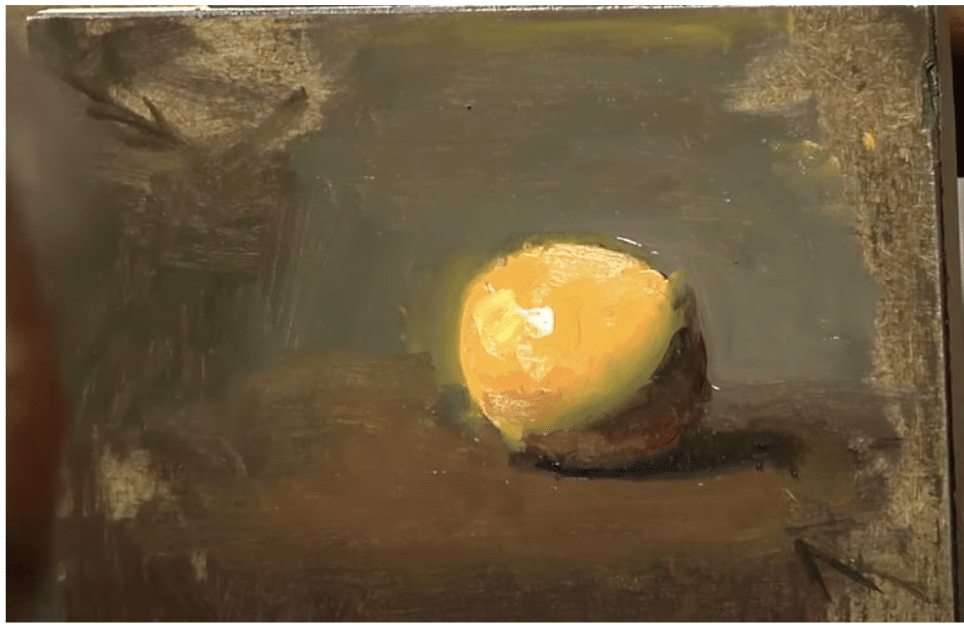
Step 1. The block-in. A basic underpainting sketch on an 8 x 10 in. linen canvas toned with (now dry) umber.
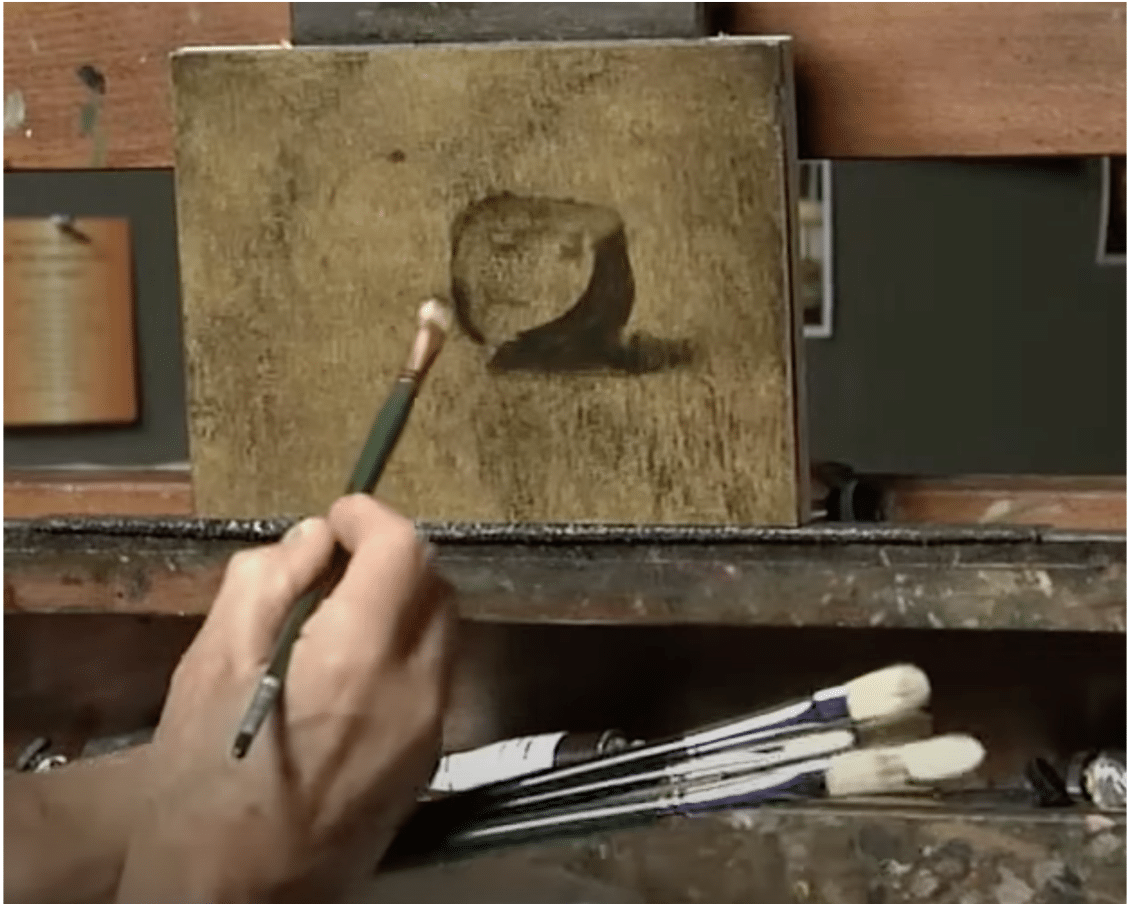
With a medium-small filbert brush, the artist starts with the main shape and blocks in the darks to make a basic monochrome sketch on a canvas toned with dry umber pigment. This step establishes the composition, where the lights are coming from, and where the shadows and reflections will be. Notice that he’s only painting the darks, not any of the surfaces receiving light, just the shadows. The fruit won’t get painted in until the next step.
Also, the same earth-color or “dark” that’s used for the main form (it’s either raw or burnt umber, sans white) is also used in the form’s cast shadow. Two things to note about that shadow:
- There’s no division between the lower edge of the fruit, the tabletop, or the shadow – it all just melds into one dark mass, and
- The shadow’s edges on the surface (tabletop, shelf or whatever – we don’t ever know and it totally doesn’t matter) are “feathered” – softened, blended, especially the shadow’s tip and the side that’s receding into the background.
Step 2. Background.
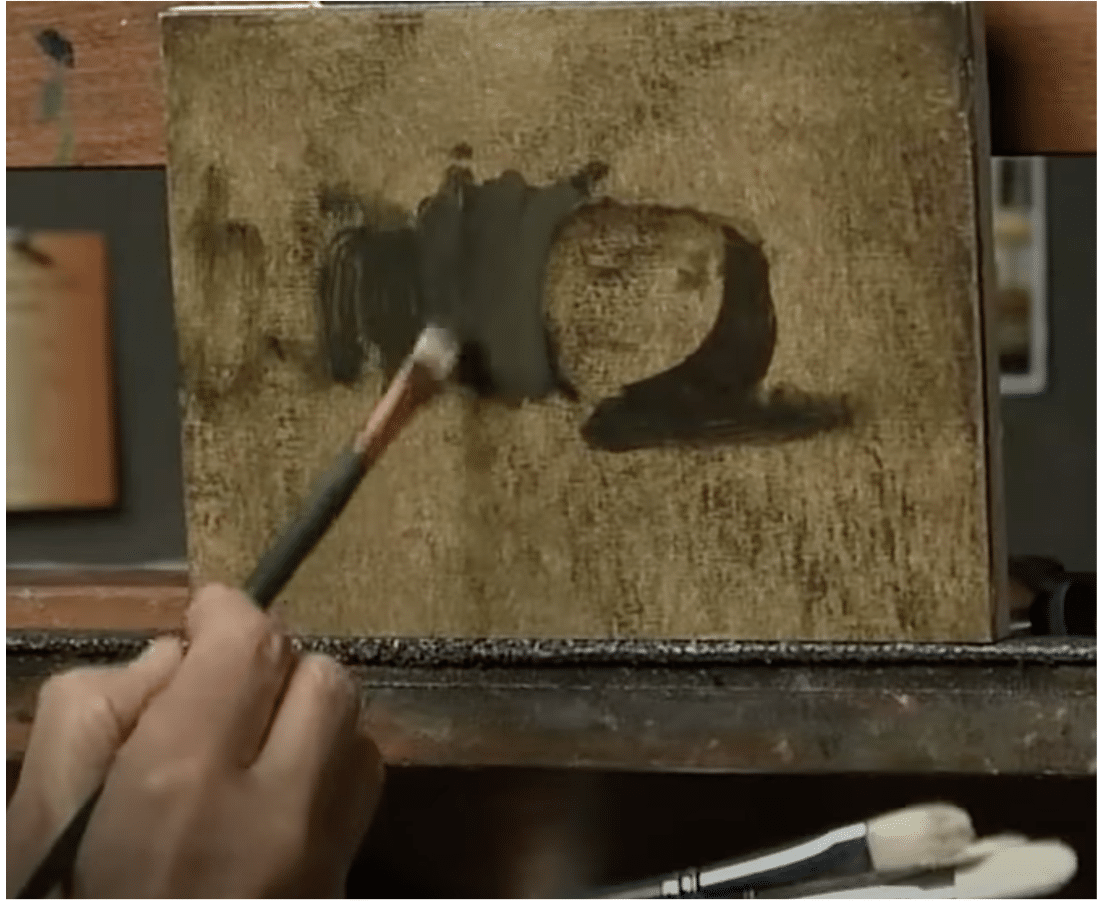
As soon as the motif’s shadows are blocked in, the artist begins adding a subdued background.
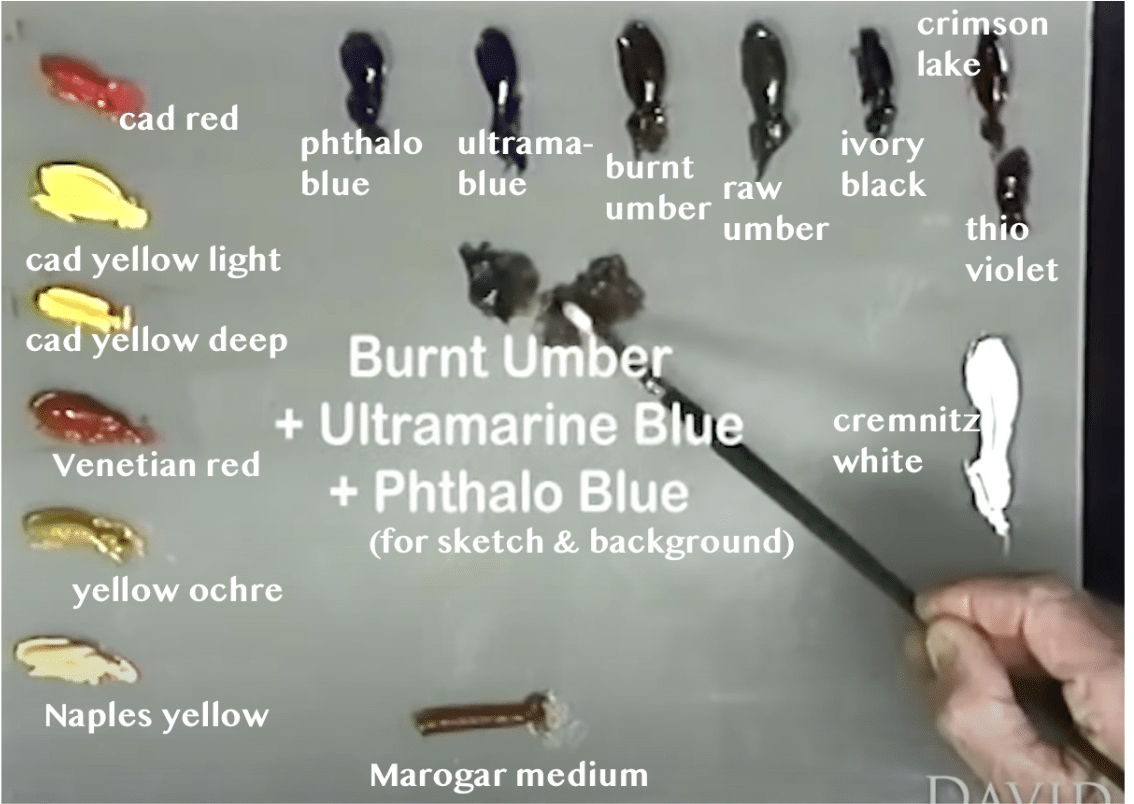
For this he mixes a green-gray “neutral” using umber, ultramarine blue, and phthalo (or Prussian) blue (plus, of course, a little white as needed.
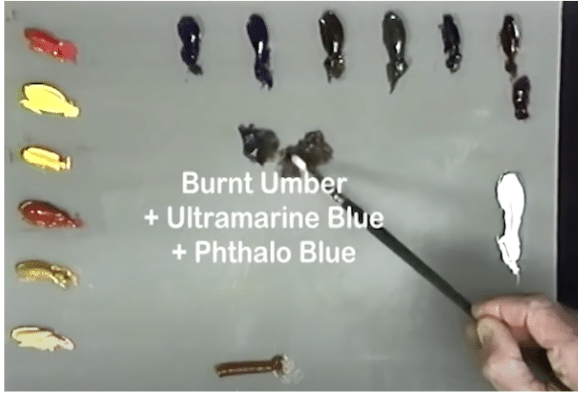
Leffel’s palette – all colors are labeled in the image included at the end.
White is only used to lighten, i.e. change the “value” of, your color mixtures, so it isn’t considered a color in its own right. Historical artists used a mixture of red and green to attain pretty much the same effect.
Step 3. Adding color.
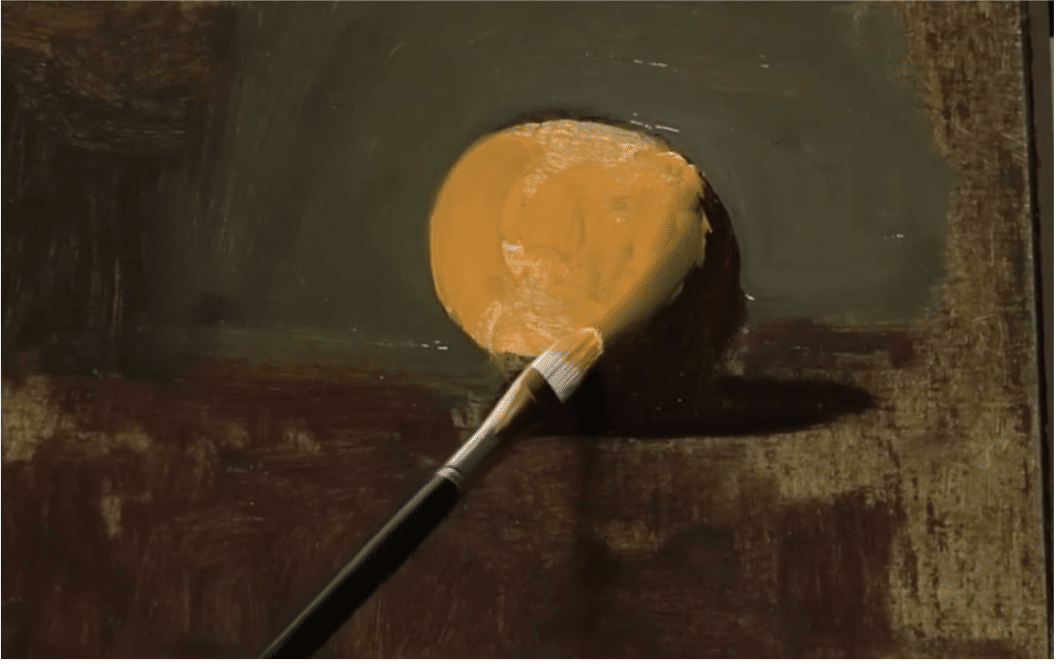
Step 3, image #1
The artist adds the base color and, all-importantly, blends the new edges. The process is to work from dark to lighter, as illustrated in the image below, working toward lighter-value, higher “chroma” (intensity) colors with warmer temperatures. Note that the colors are painted not up against the underpainting but into (slightly blending with) the paint that’s still wet from the block-in.
Step 3, image #2
Step 4. Modeling and filling out the composition.
This step is about building up form with many smaller touches of thicker paint consisting of additional highlights and shadows and adding new elements to fill out the geometry of the composition.
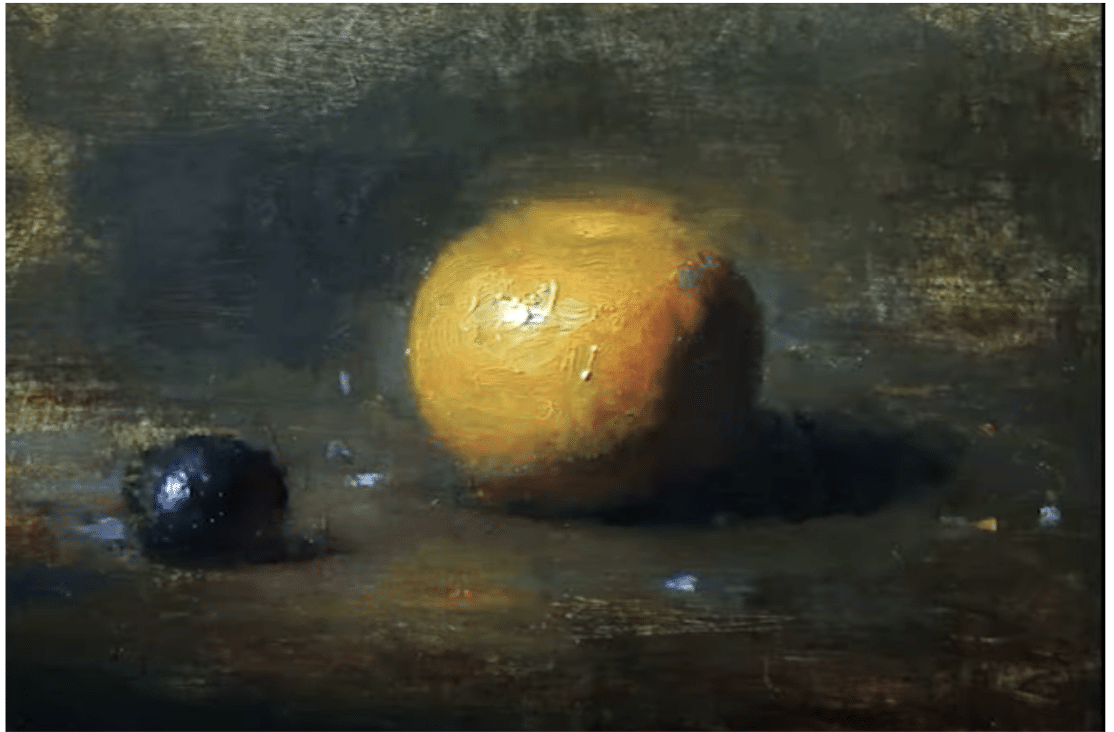
This painting is about 50% finished at this stage.
Edges are super important! Note the areas along the top of the fruit where the edges are “lost” vs. “found.” Leffel intentionally uses these lost edges as “openings” that he says allow the eye to travel from “inside” one form into the background or other forms in the rest of the painting.
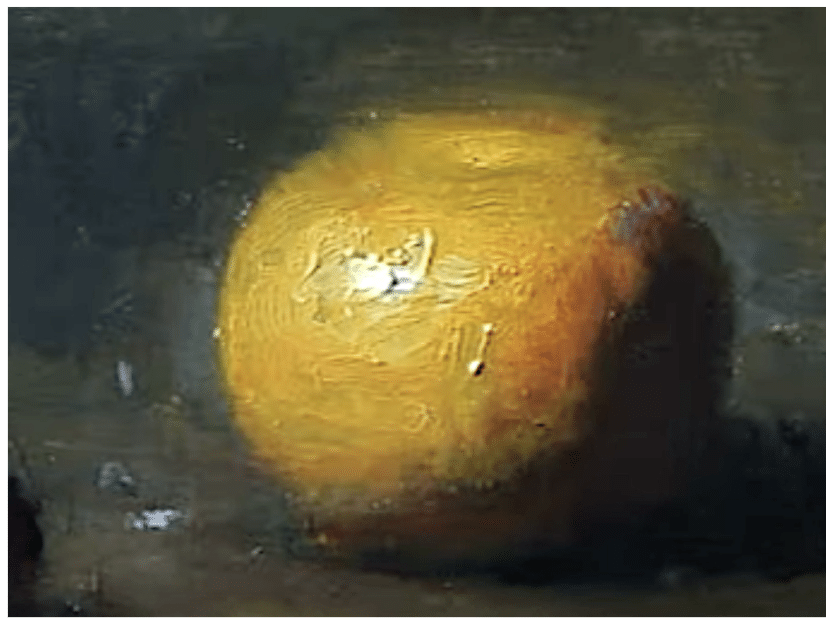
Step 5. Finish. More elements and finer details are added to develop the middle ground and foreground.
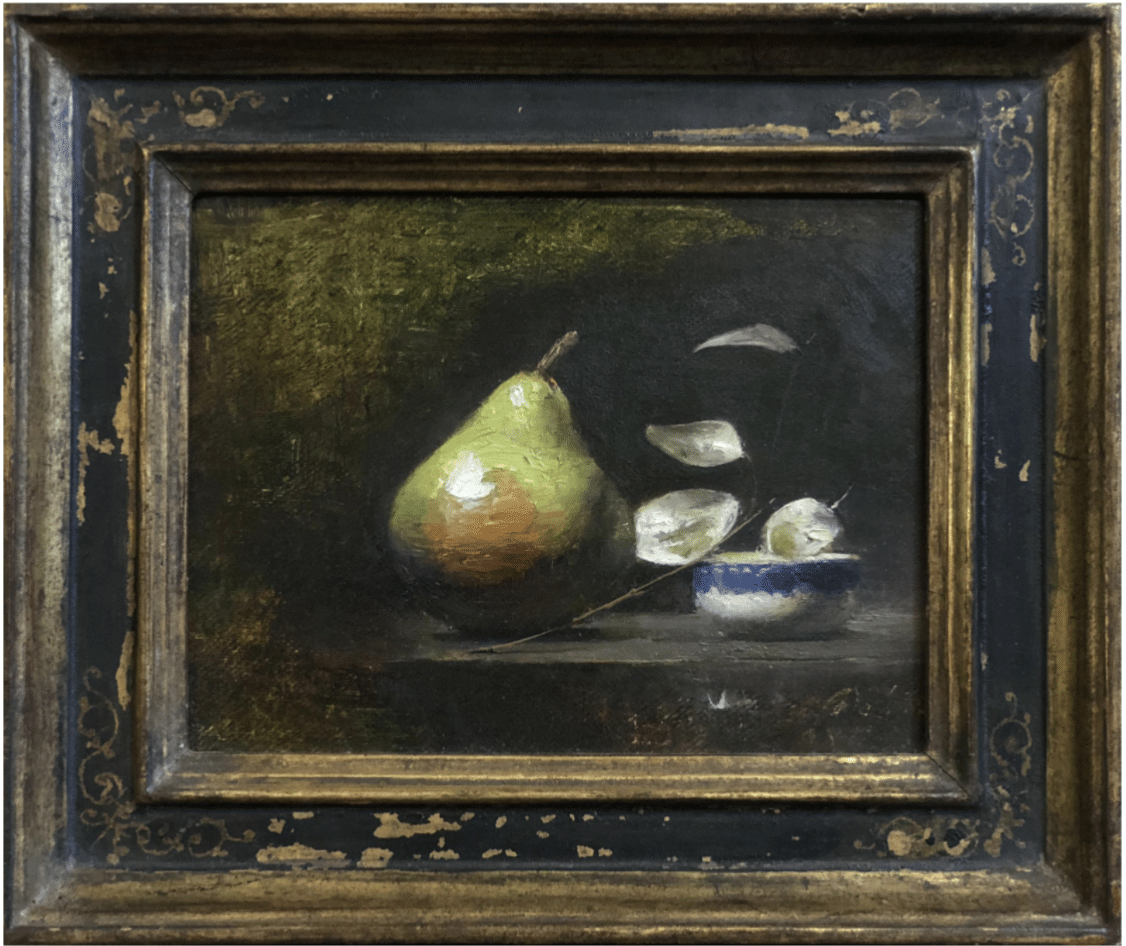
Finished painting.
This is the finished painting. It retains the feeling of a “study” because the details are kept pretty loose and the paint handling, while tight in certain areas such as the grape on the left or the floweret stems, has a casual, unfussy feel to it. The edge detail where the shadow on the fruit transitions from dark to light, although it may seem minimal, plays a very important role in establishing the fruit’s texture!
These are screen grabs from Leffel’s demo on YouTube. Watch David Leffel’s six-minute tutorial here.
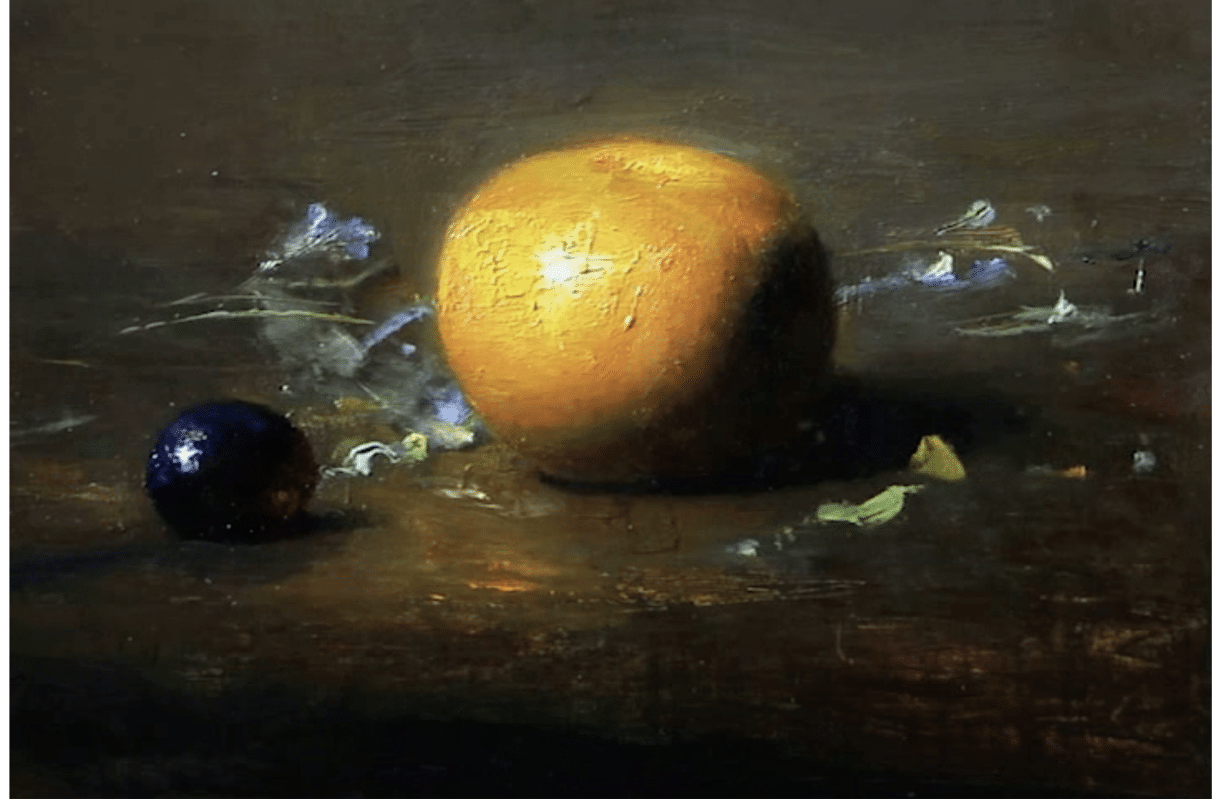
Below is another one by Leffel.
This one’s 5 x 7 inches. He’s filled in the rest of the background on this one and established the surface on which the objects rest. Throughout though, edges are still key!
David Leffel has a number of popular videos that take you step by step and teach you everything you need to know in order to make your own dynamic still lifes with a blend of old master technique and contemporary flair. Browse through them here.