“We do what we must, and call it the best names we can, and would fain have the praise of having intended the result which ensues.” – Emerson (Experience)
The key is to be wild but stay true. We call it “finding your voice,” but it should really be “letting your voice find you.”
Making authentic paintings – true to who you are, with an originality all your own – won’t happen just by thinking about it first. It won’t happen by concentrating solely on minutia and hoping something original will emerge if you paint for a long enough period of time, either. You have to be willing to play and to improvise – to be wild – to take the risks that make it happen, or else it won’t. Stop sabotaging yourself. Discover what kind of painter you are or want to be in the process of becoming and being that painter.
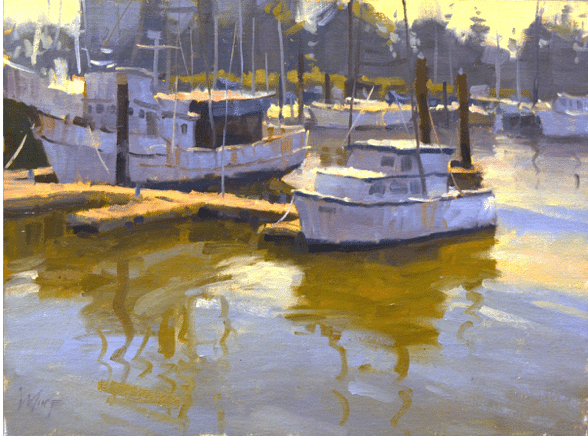
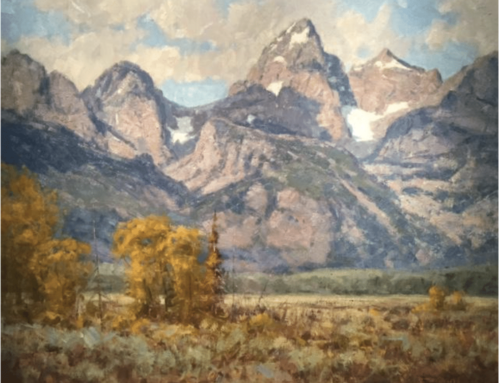
Larry Moore, “Moss Landing,” 12×16 in. oil.
As an exercise, try making several paintings of the same kind, making each one as different from the others as you can. Here are some practical steps, or non-steps, if you will – that can bring you toward the goal:
Non-Step #1 – Plan not to plan.
The attitude you take toward painting determines the range of what your painting can and will or will not be.
So, for this exercise, always start with an idea, but keep it as open as possible. Do not plan to make paintings of a thing. Do have a subject, just paint it the way you think it’s supposed to look once and then embrace play and discovery (more on that in Non-Step #2). Plan to make experiments in getting out of your own way and surrendering – to yourself. Look to get into your zone of no-thought, to operate outside of the controlling conscious mind, intuitively going with the flow of creation. For this exercise, it’s best to have a vague idea of where you want to go in a painting and not to have a plan of how to get there until you start.
Non-Step #2 – Fake yourself out.
The biggest barrier to discovery is self-consciousness and being overly critical too soon in the process. Paint right past all that self-censorship by making a bunch of small studies very quickly.
- Create a minimum of six small (6×6 or under) timed (5-10 minutes max)
- Consciously make each one as different from the last as possible.
- Work fast, work small, yet try to make each study “feel big” by sticking to essentials not details.
These quick spontaneous exercises will help prevent you from deadly overthinking. We’re not talking about random chaos on the canvas here; just know you are going to paint, for example, a landscape using a photo reference the way you normally would, but quickly and only once. After the first let’s say 20-minute pass, paint it again as differently as you can while staying true to the subject and your take on it, giving yourself 5-10 minutes for each subsequent version now.
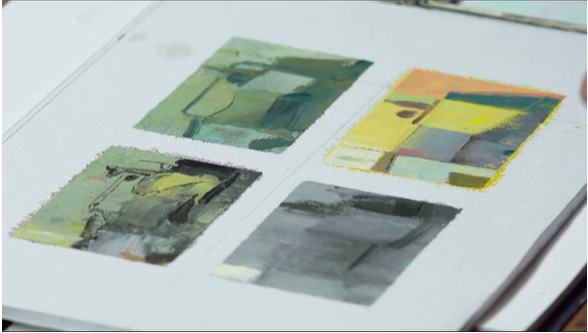
Painter Larry Moore demonstrates how to tape off sections for small, experimental studies – still from his video, “The Creativity Course, Finding Your Unique Painting Language”
To be clear, even in your sixth study, you may still want to paint a particular subject – the same place, face, mood, or arrangement of objects in a still life that you started with – only you’re being as imaginative, as bold, as wild as you can allow yourself to be.
Non-Step #3 is a reminder – Don’t make paintings.
These are experiments in letting paintings make themselves. Ask What If? Respect your random ideas. Try them out and see what works. When the dust settles, go ahead if you must and take a critical view on the lot of them, but do so only with a single purpose – not to judge what’s there, but to see what’s there to work with. Select areas of one or more of these studies to suggest what to do and where to go next. Give yourself permission to go off road and see what turns up.
If you’re feeling reckless enough, or on the flip side, if you feel you’ve been holding back and not letting go enough, repeat the process. You need to do enough of these studies to use them as the springboard for your next decision: choose the best and pick the parts you like and build on from there.
Non-Step #4 – Don’t stop. (Make more pots.)
The best way to come up with a good painting, just like the best way to have a good idea, is to make lots of paintings and to have lots of ideas. Then you can pick from them and continue with the best. Use the studies you’ve already done to direct you to which studies to make next.
Painter Larry Moore points out that any time we’re engaging with a full canvas, “the brain goes into fight mode, and you have to win. And that’s when we start beating the life out of the painting.” By using tape to divide a canvas-sized sheet of paper into quarters with enough space between them for tape around each corner, the brain relaxes and goes into study mode,” Moore says. And that lets you get out of your way even further as you multiply the number of studies by doing two, three, or four studies per page.
Again, you don’t judge these as finished paintings. You find out what you do like about them and let that tell you something about you. Follow your preferences – take a quality of brushwork from one work and a design hint from another and combine them in an entirely new work or series of works.

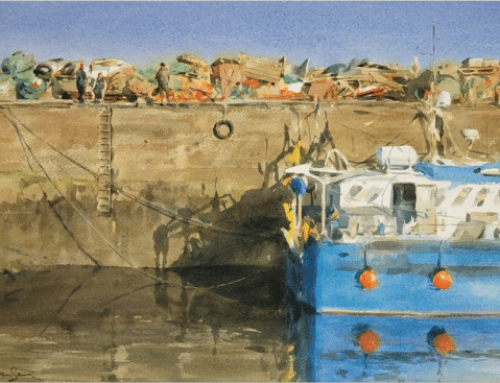
Kyle Buckland, “January Freeze,” 10 x 8 in. oil. Buckland teaches you how to unleash creativity with bold deisgn and loose brushwork in his Streamline video.
Conclusion
Every artist has the potential for effortless creation through which a meaningful body of work falls into place. Thoughts like, “I wish I could just express my true self in my work” turn into thoughts like, “Wow, look at the raw emotion and feeling in my painting!” This higher level of painting fills you with exhilaration and confidence and frees you from the burden of overthinking every detail.
Try it – or actually, don’t try it! – see what happens. Maybe what Zen Buddhist Osho says is true for artists too: ““Be. Don’t try to become. Within these two words, be and becoming, your whole life is contained.”
And if all else fails, create art as Brian Rutenberg says (paraphrasing none other than Ralph Waldo Emerson, btw): “Do what you can and pretend it’s what you meant to do all along.” ☺
Art Snippet: Know Your Shadow Types
Types of Shadows
By Brenda Swenson
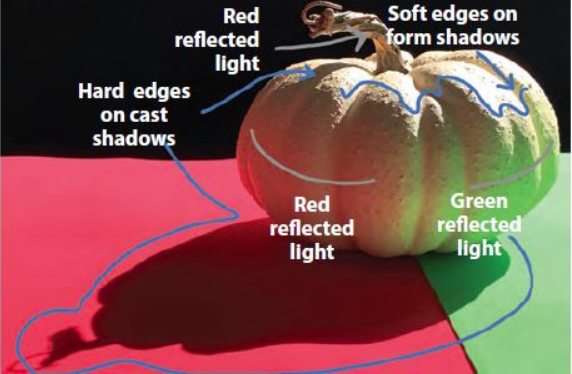
Cast shadows suggest the shapes of the objects that cast them and have distinct edges. The further a cast shadow is from the source, the more it is infiltrated by light; as a result,
it becomes warmer, softer, and paler. Cast shadows are darker in value than the objects on which they’re cast.
Form shadows are delicate in appearance and play an important role in making a subject appear three-dimensional. Form shadows are lighter in value than cast shadows. Because form shadows aren’t created by a blocked light source, but by turning from the light source, they also have softer or less-defined edges.

The illuminated area near an object reflects, or bounces, light into the shadows and carries color with it — this is called “reflected light.” The orange pumpkin on the left has form and cast shadows.
In this art video workshop with Brenda Swenson, you’ll learn that paintings benefit from a variety of positive and negative painting. Brenda outlines the tools and materials needed for this approach before entering into a step-by-step demonstration of this process. [Learn more about negative painting with watercolor here!]