By Art Namarilnam
There must be as many ways to paint a landscape as artists to paint them. Here is one way (not THE way) that I use to paint a landscape with a limited plein-air palette. I call it my 12-step program.
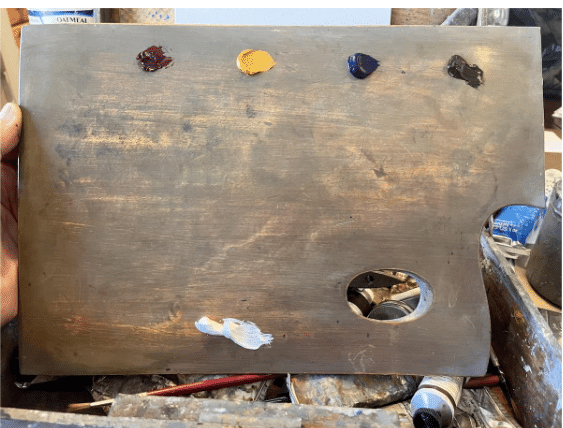
My limited palette (l-r): alizarin crimson, yellow ochre, ultramarine blue, burnt umber, titanium white.
Step 1. Plan the composition. Make a series of thumbnail sketches (tiny drawings, about the size of a postage stamp or a business card) to find the best composition.
Step 2. Mix a black using ultramarine blue and burnt umber and cover the entire canvas with a very thin, “scrubbed-in” layer. Get it on fast with any big brush, such as a “mop” or hardware-store “chip brush” (shown).
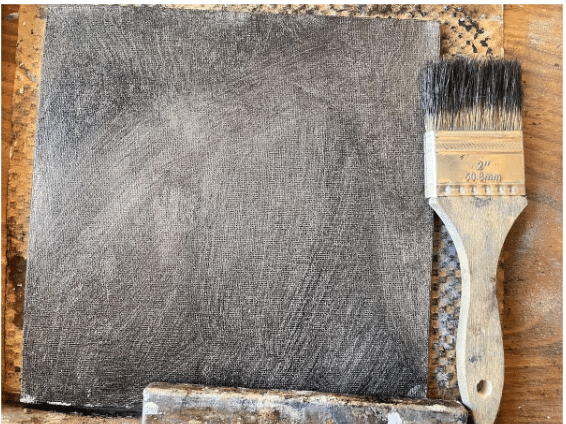
You dip your brush first in a tiny amount of turps to help it dry faster, but it’s not necessary if you manage to paint it thinly enough.
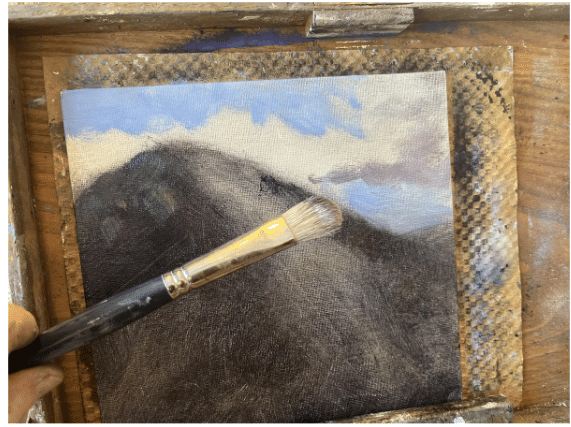
Step 3. Use a dry paper towel to wipe out space for the sky.

Step 4. Use the same paper towel to subtract paint for the areas of light and to create volume, contour and perspective. Be mindful of the direction in which you’re wiping out (use the paper towel like a drawing tool as if you are “shaping” the mountain’s contours).
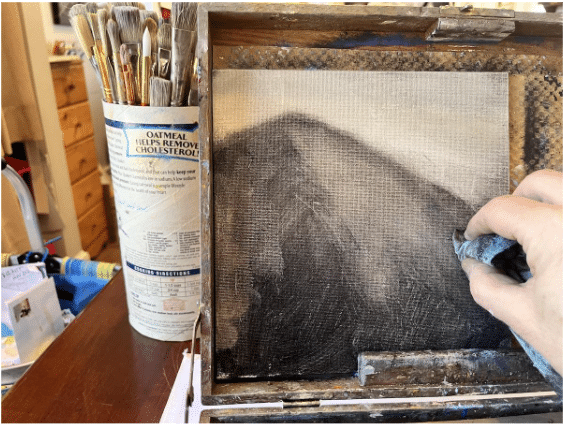
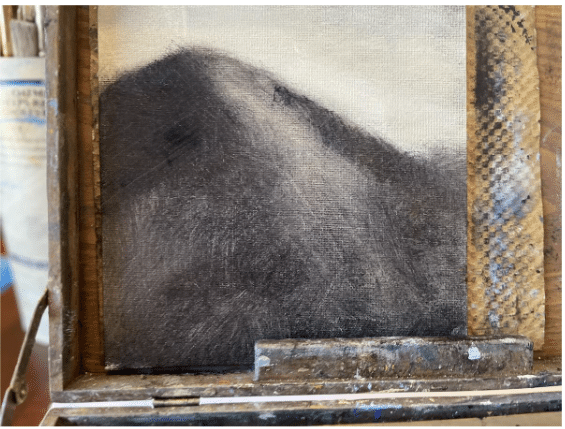
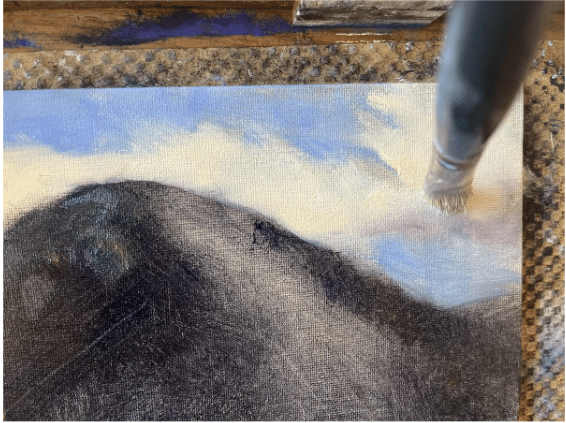
Step 5. Remove an additional layer where you’ll paint the sky. If you need to, use some thinner on your paper towel to get all the way down to the white of the canvas.
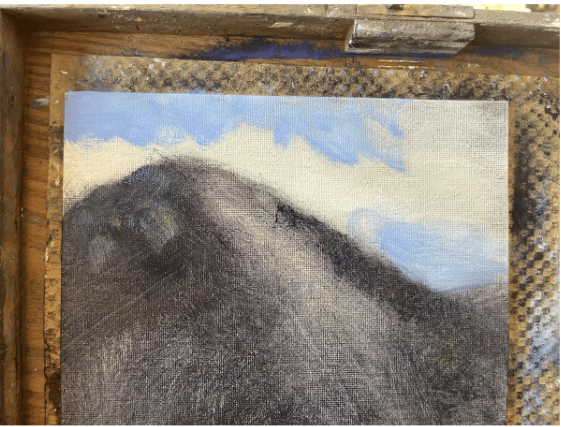
Step 6. Mix a color for the sky (for this one I started with white and added a little ultramarine) and a warm white/peach for the clouds (instead of cold, plain white, warm it up with a minute amount of yellow ochre. Add a miniscule bit of the crimson if it’s getting toward sunset). Use a medium filbert (rounded tip) brush to paint the sky (the blue area) first, leaving space for the clouds. Create and add a dull violet for cloud shadows and then paint in the cloud color, all using the medium-size brush.
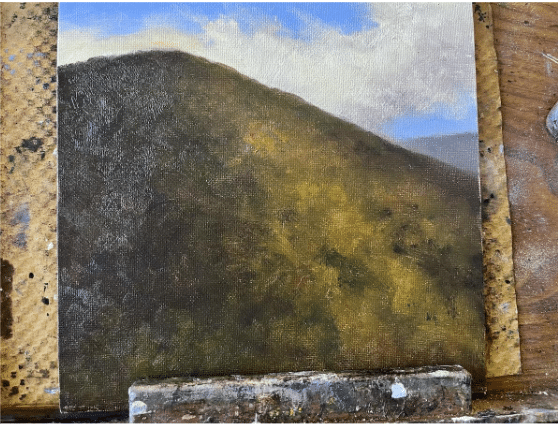
Step 7. Still using the medium filbert and working dark to light (if using oils), block in the shadows on the are opposite where the light is coming from (left side in our example and a bit on the right where the mountain turns away from the viewer). I used a simple dark green (ultramarine + yellow ochre) but violet modified with a little complementary yellow ochre works really well too.

Step 8. Add the mid-tones, blending into the shadow-areas and going lightly over the areas that will get the highlights. Color is up to you. Here it’s just ultramarine blue + yellow ochre.

Step 9. Switch to a smaller filbert brush and add more mid- to light-tones with short staccato taps of the brush-tip to suggest broad details such as gullies, ridges and clumps of trees. In this example, it’s a warmish green made by adding a greater proportion of yellow ochre to the same ultra + ochre mix. There’s also a few swipes of yellow ochre plus alizarin crimson for a bit of complementary counterpoint to all the green.
Step 10. Using the same or a smaller brush, start adding finer details. Emphasize shadow-areas and lighter spots to actual topography. Keep in mind that, far from being random, details (like the rockface in the pic below) can do double duty – use them to enhance the composition and reinforce the perspective (based on where you put them and how you shape them.)

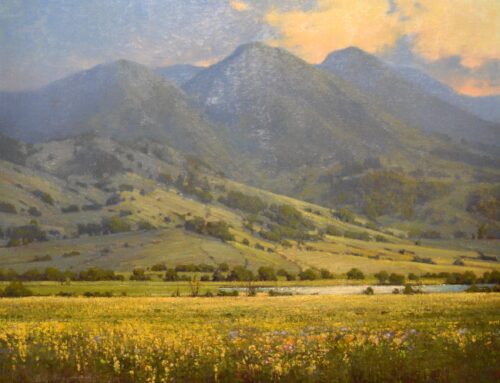
The finished 8” x 8” oil painting.
Step 11. Adjust overall values, darkening the darks and lightening the lights as needed. This step makes the difference between a perfectly fine yet non-striking piece and one that “pops.”
Step 12. Sign it and start a new one. Just kidding, I needed a twelfth step to go with the title of this article. But you should sign your work to mentally “own” it, and you should already be thinking about the next painting – so that nothing gets too precious or intimidating. Painting is supposed to be fun, remember?!